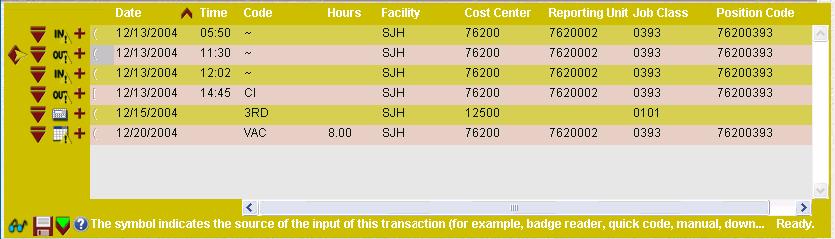
The Transactions List view option displays details of employee clocking, calendar and/or adjustment transactions for the pay period selected from the Employee Navigator section in the left pane. Depending on the authorization roles assigned, employees may be able to add, edit and/or delete calendar, clocking and adjustment information from this screen.
This information can also be displayed in a  Transaction Grid view.
For more information on the functionality available from this screen, see Transaction Grid.

The following symbols may be displayed on the Transactions screen:

|
Adjustment -passing to payroll interface
|
Indicates an adjustment entry to the employee timecard which will be passing to the payroll interface.
|

|
Adjustment - not passing to payroll interface
|
Indicates an adjustment entry to the employee timecard which is not passing to the payroll interface.
|

|
Adjustment - undetermined
|
Indicates an adjustment entry to the employee timecard which has not been determined whether it is passing to the payroll interface.
|

|
Calendar
|
Indicates a calendar entry, showing non-productive time.
|

|
Clocking
|
Indicates a clocking in the exception area of the Time Card Screen. This icon also is displayed when a clocking has been manually entered and has not yet been calculated and determined to be either an IN or OUT punch.
|

|
In Punch
|
This icon indicates a clocking entry that has been determined by the system to be an In punch.
|

|
Out Punch
|
These icons indicate a clocking entry that has been determined by the system to be an OUT punch.
|

|
Critical Exception
|
Indicates a serious issue with an employee timecard. The timecard cannot be approved until this exception has been resolved. An example of a critical exception is "An Odd Clocking was detected".
|

|
Warning Exception
|
Indicates a moderate issue in an employee timecard. The timecard can still be approved, however, the employee may not be paid as they expect. An example of a warning exception is "Hours reported in excess of Approved Hours in the pay period."
|

|
Informational Exception
|
Indicates a relatively minor issue in an employee timecard. The timecard can still be approved if this exception is not resolved. An example of an informational exception would be if an employee clocked in at an unauthorized badge reader.
|

|
Pending Exception
|
Indicates exceptions that will be displayed in the future if the employee's time card data does not change. Pending exceptions are determined by the (Calcs) process and stored with the record but not displayed until the day after the day associated with the record.
|

|
Note
|
Indicates there is a note attached to this transaction. This icon is also displayed if there is a Reason attached to a request. Hover the cursor over the icon to display the predefined note code and also the user who assigned it.
|
b
|
Badge Reader
|
Indicates the transaction results from swiping a badge at the badge reader. Hover the cursor over the icon to display the badge reader number.
|
C
|
Core Schedule
|
Indicates an entry on the schedule screen that was automatically generated during a Core scheduling pass.
|
e
|
Education Tracking Reader
|
Indicates the transaction was entered through an Education Tracking reader (for an education transaction class).
|
d
|
DeductIT
|
Indicates this was added via a DeductIT transaction.
|
H
|
Home Health Care
|
Indicates this is a Home Health Care transaction.
|
i
|
Data Import
|
Indicates this transaction is from imported data.
|
L
|
Legacy
|
Indicates this is a transaction from a legacy system.
|
N
|
Needs-Based Schedule
|
Indicates an entry on the schedule screen that was automatically generated during a Needs-based scheduling pass.
|
P
|
Education Tracking Download
|
Indicates this transaction is from a download to the Education Tracking application.
|
r
|
Cash Register
|
Indicates this transaction originated from a cash register (for DeductIT).
|
S
|
Manually Added Schedule
|
Indicates the transaction was manually added or updated on the schedule.
|
T
|
Trade
|
Indicates this is transaction resulting from a schedule trade.
|
W
|
Request to Work
|
Indicates this transaction was entered as a result of a request to work.
|
~
|
TimeCall
|
Indicates the transaction was called in using the TimeCall feature.
|
@
|
Quick Badge
|
Indicates the transaction was entered through the portal through the Quick Badge feature.
|
#
|
Staffer
|
Indicates this data was added via the Staffer interface.
|
$
|
Schedule Incentive
|
Indicates this is a transaction resulting from a schedule incentive.
|
^
|
Auto-Generated
|
Indicates the transaction was automatically generated by the system, for example, creating a matching out punch when a new special code is entered
|
(
|
Reassign
|
Indicates a clocking or calendar within the selected pay period that was reassigned to a new Labor Distribution by the system.
Note: The reassign process is called directly by the Employee Download or Replication processes when a new Home Labor Distribution is created, or when a new Labor Distribution is created in the Employee Record via the Web Portal. Transactions associated with the old home labor distribution on or after the new home labor distribution are updated to the new home labor distribution information.
|
[
|
Manual
|
Indicates the transaction was manually entered.
|
MR
|
Manual Retro Adjustment
|
Indicates the transaction was manually added in Retro mode.
|
]
|
Conversion, Upgrade
|
Indicates the input results from data from the conversion process.
|
Actions
The following actions are available in the left pane to authorized users for handling employee transactions.
To update the status of a transaction, check the box on the record and click on the selected action button listed below.
Approve Selected
The Approve button is used to allow the employee to take the request.
To approve one or more records, complete the following steps:
- Click on the selection box to the left of each record to be approved.
A check mark is displayed.
- Click the Approve button.
The status of the request is updated to Approved.
Note: Depending on the record type, check boxes may not be available when a single record is open.
Cancel Selected
The Cancel or Cancel Selected status is used to withdraw one or more previously submitted requests.
To cancel request records, complete the following steps:
- Click on the selection box to the left of each record to be canceled.
A check mark is displayed.
- Click on the Cancel or Cancel Selected button in the left pane.
The status of the request is updated to Canceled and the following icon is displayed  .
.
Note: Depending on the record type, check boxes may not be available when a single record is open.
Delete Selected
The Delete button is used to remove one or more records from a screen.
To delete a record, complete the following steps:
- Click on the selection box to the left of each record to be deleted.
A check mark is displayed
- Click the Delete button.
- If a single record is open, select the Delete button (there are no boxes to select the record).
- A message is displayed verifying the record should be deleted. Click on Yes to continue.
Deny Selected
The Deny button is used to inform employees that their request is not allowed.
To deny one or more records, complete the following steps:
- Click on the selection box to the left of each record to be denied.
A check mark is displayed
- Click the Deny button in the left pane.
The status is updated to Denied, and the following icon is displayed  .
.
Note: Depending on the record type, check boxes may not be available when a single record is open.
Pending Review Selected
The Pending Review status is used to let employees know that their request has been seen, but has not yet been handled.
To set the status of a record to Pending Review, complete the following steps:
- Click on the selection box to the left of each record to be set to this status.
A check mark is displayed.
- Click on the Pending Review Selected button.
- If a single record is open, click on the Pending Review button (there are no boxes to select the record).
- A message is displayed verifying the record should be set to this status. Click on Yes to continue.
Pool Approve Selected
The Pool Approve Selected button sets the status of all selected pool transactions to Approved.
To approve a pool record, complete the following steps:
- Click on the selection box to the left of each record to be approved.
A check mark is displayed.
- Click on the Pool Approve Selected button.
- A message is displayed verifying the record should be approved. Click on Yes to continue.
Pool Unapprove Selected
The Pool Unapprove Selected button changes the status of all selected pool transactions from Approved back to an unapproved state.
To remove approval for one or more pool records, complete the following steps:
- Click on the selection box to the left of each record to be approved.
A check mark is displayed.
- Click on the Pool Unapprove Selected button.
- A message is displayed verifying the record should be approved. Click on Yes to continue.
Set Requested Selected
The Set Requested Selected button is used to change a request that was previously set to Pending Review back to the status of Requested.
To assign one or more requests to this status, complete the following steps:
- Click on the selection box to the left of each record to be set.
A check mark is displayed.
- Click on the Set Requested Selected button.
- A message is displayed verifying the record should be reset. Click on Yes to continue.
The status is updated.
The Transaction Grid gives the user the option to view the same information on the Transaction List, but in a grid format. To enable this option, in the Preferences section>My Preferences card>Time Card Screen, select the Transaction Grid button in the left pane.
Authorized users are able to add, edit, view and/or delete records from this screen. Depending on the authorization roles of the user, these transactions may need to be approved by a supervisor before they are in effect.
For more information on transactions that can be entered through this screen, click on the following links:
If a critical event message is generated due to an unfulfilled license or education requirement, employees may be unable to enter, modify or delete a clocking through this screen. The reason for the "lockout" can be viewed on the Home page>My Unread Messages card or in the Actions section>Employee card>Messages screen. Contact the employee's supervisor or an administrator to resolve the issue.
The following tabs are available when viewing an existing Calendar on the Transaction Grid
General
|
This tab displays basic information about this transaction, including the date, time, organization unit and labor distribution.
|
Attendance+
|
This tab is used to add predefined codes explaining the reason for the calendar entry, including whether the transaction was excused or unexcused.
|
Notes
|
This tab to is used to add a notation to the calendar transaction.
|
Exceptions Tab
|
This tab is enabled if an exception message is generated relating to the transaction. Note: Critical exceptions must be handled before the time card can be approved.
|
Requested Differences
|
This tab is enabled on the Transaction Grid if an employee requests an edit to the transaction. The tab displays the difference between the original and the request. Once the request is handled, this tab is no longer enabled.
|
Requested History
|
This tab is enabled on the Transaction Grid if an employee requests an edit to the transaction. The tab displays the submitting and approval history of the request.
|
Actions
The following actions are available in the left pane to authorized users for handling employee transactions.
To update the status of a transaction, check the box to the left of the record and click on the selected action button listed below.
Approve Selected
The Approve button is used to allow the employee to take the request.
To approve one or more records, complete the following steps:
- Click on the selection box to the left of each record to be approved.
A check mark is displayed.
- Click the Approve button.
The status of the request is updated to Approved.
Note: Depending on the record type, check boxes may not be available when a single record is open.
Cancel Selected
The Cancel or Cancel Selected status is used to withdraw one or more previously submitted requests.
To cancel request records, complete the following steps:
- Click on the selection box to the left of each record to be canceled.
A check mark is displayed.
- Click on the Cancel or Cancel Selected button in the left pane.
The status of the request is updated to Canceled and the following icon is displayed .
Note: Depending on the record type, check boxes may not be available when a single record is open.
Delete Selected
The Delete button is used to remove one or more records from a screen.
To delete a record, complete the following steps:
- Click on the selection box to the left of each record to be deleted.
A check mark is displayed
- Click the Delete button.
- If a single record is open, select the Delete button (there are no boxes to select the record).
- A message is displayed verifying the record should be deleted. Click on Yes to continue.
Deny Selected
The Deny button is used to inform employees that their request is not allowed.
To deny one or more records, complete the following steps:
- Click on the selection box to the left of each record to be denied.
A check mark is displayed
- Click the Deny button in the left pane.
The status is updated to Denied, and the following icon is displayed .
Note: Depending on the record type, check boxes may not be available when a single record is open.
Pending Review Selected
The Pending Review status is used to let employees know that their request has been seen, but has not yet been handled.
To set the status of a record to Pending Review, complete the following steps:
- Click on the selection box to the left of each record to be set to this status.
A check mark is displayed.
- Click on the Pending Review Selected button.
- If a single record is open, click on the Pending Review button (there are no boxes to select the record).
- A message is displayed verifying the record should be set to this status. Click on Yes to continue.
Pool Approve Selected
The Pool Approve Selected button sets the status of all selected pool transactions to Approved.
To approve a pool record, complete the following steps:
- Click on the selection box to the left of each record to be approved.
A check mark is displayed.
- Click on the Pool Approve Selected button.
- A message is displayed verifying the record should be approved. Click on Yes to continue.
Pool Unapprove Selected
The Pool Unapprove Selected button changes the status of all selected pool transactions from Approved back to an unapproved state.
To remove approval for one or more pool records, complete the following steps:
- Click on the selection box to the left of each record to be approved.
A check mark is displayed.
- Click on the Pool Unapprove Selected button.
- A message is displayed verifying the record should be approved. Click on Yes to continue.
Set Requested Selected
The Set Requested Selected button is used to change a request that was previously set to Pending Review back to the status of Requested.
To assign one or more requests to this status, complete the following steps:
- Click on the selection box to the left of each record to be set.
A check mark is displayed.
- Click on the Set Requested Selected button.
- A message is displayed verifying the record should be reset. Click on Yes to continue.
The status is updated.
The values that display in the Smart Drop Down Menu list have been previously selected by the user for this same field within two pay periods from today’s date. For example, in the employee Time Card Screen (TCS), if the employee clicks on the job class drop down menu, only those job classes that have been entered by the employee within the previous two pay periods are listed.
If a value is not listed, a search can be conducted to find the value. That value is then added to the smart drop down menu for the next two pay periods from the current date.