Publishing Highlighted Cells
Selected schedules in one or more cells can be published, without publishing the entire schedule. These schedules can be for a single employee or for multiple employees, for a single day or for multiple days.
To publish selected cells, complete the following steps:
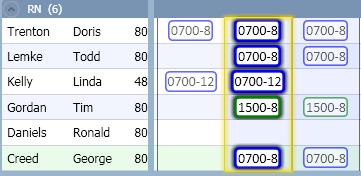
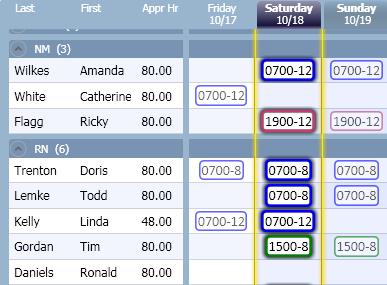
- Highlight the cells of the schedules to be published.
- To highlight a single cell, click on it. A gold box is displayed around the cell
- To select multiple cells, complete the following.
- Position the cursor on the first cell of the series.
- Drag the cursor to the last cell of the series. Note: Be sure to position the cursor outside the activity box in the cell. Otherwise, when dragging to the last cell, the activity in the cell will be moved.
- The selection can be a horizontal line of schedules for the same employee.

- The selection can be all the schedules of a selected employee. Click on the employee name to highlight all the cells in the open schedule.

- The selection can be a vertical line of schedules for multiple employees for the same day.

- The selection can be for all the schedules on a particular day. Click on the date header to highlight all the schedules for that day.

- The selection can be a block of schedules for multiple employees and days.

- There are three options to access the action for publishing a schedule.
- Right-click to display the menu. Select the Publish function
-or-
- From the tool bar, select the Edit menu, then the Publish function
-or-
- On the keyboard, simultaneously hold down the <Ctrl> and U buttons
- Depending on the style selected, a published schedule is either indicated by a bold border and font or by the activity box being filled in with the selected activity color.

|
Transparent Style
|

|
Solid Style
|
Note: To change the style, go to the tool bar, then open the View menu, then the Style option. Select either the Transparent Style or the Solid Style.


