![]()
![]()
![]()
![]()
|
|
|
|
|
Tip: The following information about setting preferences is optional.
If you routinely access ActiveRoster for the same organization unit or schedule group, you can set a preference for that information to automatically fill when you open ActiveRoster so that you do not have to enter it every time. Note that default organization units and schedule groups also set the defaults for other search screens in the system.
To enable a default organization unit or schedule group, navigate to:
If you do not have the appropriate permission to create schedule groups, contact a system administrator for assistance.
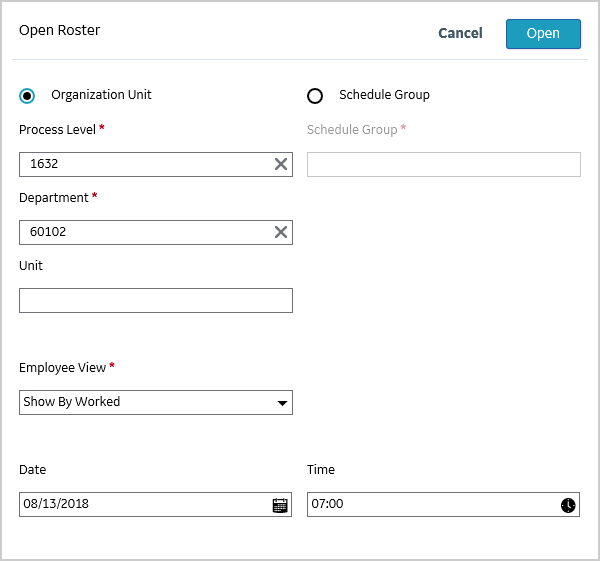
Open ActiveRoster
To open and view ActiveRoster, complete the following steps.
The Open dialog box appears.
As you type, the list of options in the menu are filtered based on what you enter.
Show employees working in the selected organization unit regardless of their home labor distributions
Show employees whose home labor distribution matches the selected organization unit regardless of where they are working
Example: Eight RNs in Department A123 are scheduled. Six are scheduled in A123 and two are floating elsewhere. In addition, one employee from B987 is floating into A123.
With the Employee View option set to Show by Worked, seven RNs appear in the roster (six plus the float from B987).
With the Employee View option set to Show by Home, eight RNs appear (all eight from A123; the float from B987 does not appear).
By default, ActiveRoster opens to today's date and the current time.
To change to a different organization unit, schedule group, or date, complete the following steps.
The Open dialog box appears.