DeductIT Entries
The DeductIT Entries screen is used to add, edit or view employee deductions for the DeductIT automatic deductions feature. This feature is used to deduct authorized charges from an employee's paycheck (for example, from the cafeteria, gift shop, etc.) Deductions can be made through an input device, or may be manually entered into the system through this screen.
Note: A deduction may also be added through the Add DeductIT Entry screen in the Employee Actions.
Existing records are displayed in a grid format. Click the folder to the left of a record to open and view it.
When a deduction is set to be distributed over more than one pay period, the current and future transactions are calculated by the system and displayed on the Details screen. Click on the Calc DeductIT Now button to calculate the deductions for this employee.
The following Sections are available when a DeductIT Entries record is opened:
General
|
Gives general information on the deduction transactions.
|
Details
|
Displays details on each past, current, and future pay period deduction transaction and the amount.
|
Action Buttons
The following Action buttons may be available in the left pane for adding or deleting related records:
 Add
Add
The Add button opens a screen where authorized users can create a new record.
To add a new record, complete the following steps:
- From the right pane, click on the Add button.
- A screen is displayed to enter values. The fields with an asterisk are required and must be completed before the record can be saved.
- Click on the Save button to save the record,
Note: For more information, see Adding a New Record.
Note: The Add button is not available when the  pay period selector in the Employee Navigator is set for the previous pay period.
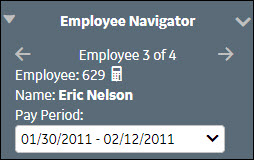
The Pay Period field in the Employee Navigator section is used to change the pay period view on the currently opened employee. The information displayed on many of the cards on the time card summary page (e.g. benefit balances, pay distribution information, etc.) are specific to the pay period selected in the left pane. From the Pay Period drop down menu, highlight the pay period to be viewed:

Icons:

|
The left arrow by a date range indicates the pay period prior to the current one.
Click on the left arrow by the employee name to scroll to the previous employee record.
|

|
The star by a date range indicates the current pay period.
|

|
The right arrow by a date range indicates the pay period following the current one.
Click on the right arrow by the employee name to scroll to the next employee record.
|
 Delete Selected
The Delete button is used to remove one or more records from a screen.
To delete a record, complete the following steps:
- Click on the selection box to the left of each record to be deleted.
A check mark is displayed
- Click the Delete button.
- If a single record is open, select the Delete button (there are no boxes to select the record).
- A message is displayed verifying the record should be deleted. Click on Yes to continue.
 pay period selector in the Employee Navigator is set for the previous pay period.