Granting Access to a Required Screen
Issue: Users do not have access to a screen that is required for them.
Troubleshooting Tips:
If the employee does not have the icon to access a specific screen, they do not have a role assignment that grants permission to the screen. This can be resolved in one of the following ways:
- The user can be assigned to another role with the required functionality access.
 More About Adding An Employee Role
- An existing non-standard role can be updated to grant the required access.
 More About Updating an Existing Role
- Remember that any changes to a role will update the access for ALL employees assigned to that same role.
- Standard roles cannot be edited--a new role must be created and modified.
- A new role can be created which has the required access and assigned to the user.
 More About Creating New Roles
New roles can be created by adding a role or by replicating an existing role that has most of the required attributes, and then modifying it to change the access.
- For more information on creating a new role, see Steps for Creating a New Role.
- A replicated role can also be replicated again, and modified to create another role with different attributes. For more information on replicated roles, see Steps for Replicating a Role.
To find the roles that grant access to a screen, run the Authorization Roles Assigned to a Policy report. This can be found in the Reports section>System card. In the Field Look Up Values in the right pane, locate the required screen. Options are listed by Section, then Card, then Screen.
- Click on the Request Report button. The generated report lists all the roles that contain the required policy.
- Click on the box to the left of a policy to open and view the other attributes of the policy.

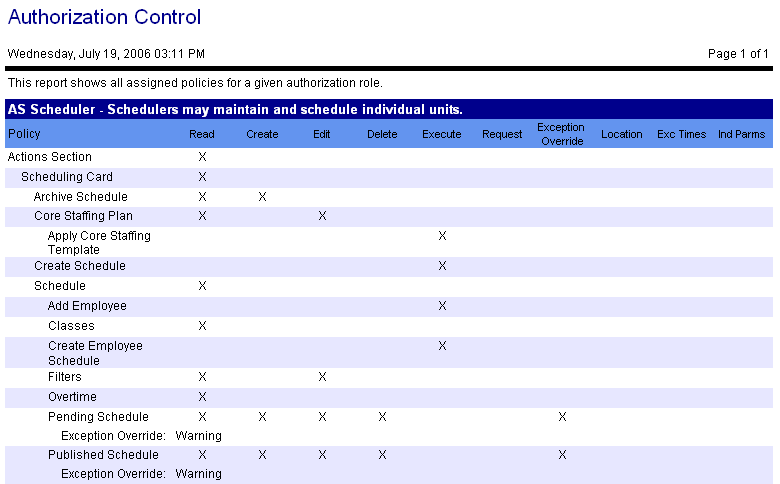
- To view other policies granted to a user through a specific role, run the Authorization Control report for that same role. If this policy meets the needs of the user, it can be assigned to the user.

Granting Access to a Screen:
- From the Configuration section>System card, open the Roles screen.
- Search for and open the record to be updated, or create a new role.
- Click on the Authorization Controls button in the left pane.
- Expand the folders in the Authorization Policy Hierarchy to find the screen or policy to be updated. Note: In order to access a specific screen, the user must grant access to each of the levels above the selected screen. In the example below, the users are first given access to the Preferences Section. The User Preferences Card is then available.
 More About Setting up Access to Parent Structure Levels.
 The steps to set up the access to parent structure levels are as follows:
- From the Configuration section>System card>Roles screen, locate and open the Role record to update.
- Select the Authorization Controls button in the left pane to access the Authorization Policy Hierarchy tree.
- In the Authorization Policy Hierarchy tree, highlight the Root level. The Section options are displayed in the right pane.
- For the parent Section record, click on the Add button to add this policy to the role. The button action is changed to Remove. In the example below, the Configuration Section is made accessible to this role.

- In the Authorization Policy Hierarchy tree in the left pane, highlight the parent Section option. The related Card options are displayed in the right pane.
- For the parent Card record, click on the Add button to add access to this card to the role. The button is changed to Remove. In the example below, the Assignments Card is made accessible to users in this role.

- In the Authorization Policy Hierarchy tree, highlight the parent Card of the policy to be viewed. The related Screen options are displayed in the right pane.
- For the parent Screen record, click on the Add button to add access to this card to the role. The button is changed to Remove. In the example below, the Holiday screen is made accessible to users in this role.

- Set the Read value to Yes to allow the user to view the screen, and set the Edit value to Yes to allow the user to enter values into the screen.

 More About Adding An Employee Role
 More About Updating an Existing Role
 More About Creating New Roles

 More About Setting up Access to Parent Structure Levels.