The Call In scheduling assistant function opens a wizard used to search for qualified employees to fill a schedule opening. Selected employees are then added to the schedule screen.
How it works:
The system first determines which activity codes can fill the need of the schedule opening. Eligible activity codes are determined by one of the following methods:
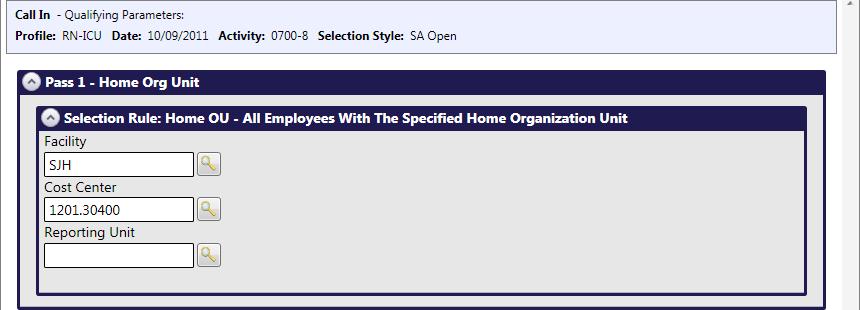
The system then determines which employees are eligible to work the selected activity codes based on the qualification rules, such as Schedule Overlap or Overtime, set up on the specified selection style. The scheduling assistant may run multiple passes. For example, the first pass may look for employees who are under their approved hours and the second pass for employees under their overtime hours.
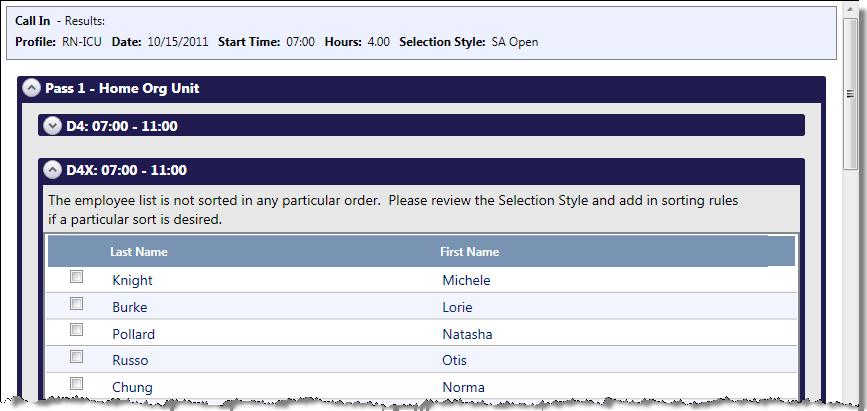
The process then gives you a list of qualified employees. The employees appear under the activity code they are qualified to work and they may appear under multiple activity codes. For example, if the scheduling assistant was run for the start time of 07:00 with a length of 8 hours, there might be several activity codes that fall within that time frame, such as D4, D6, and D8. All of these activity codes would show a list of employees who are eligible to work the activity.
To run the Call In scheduling assistant, complete the following steps:
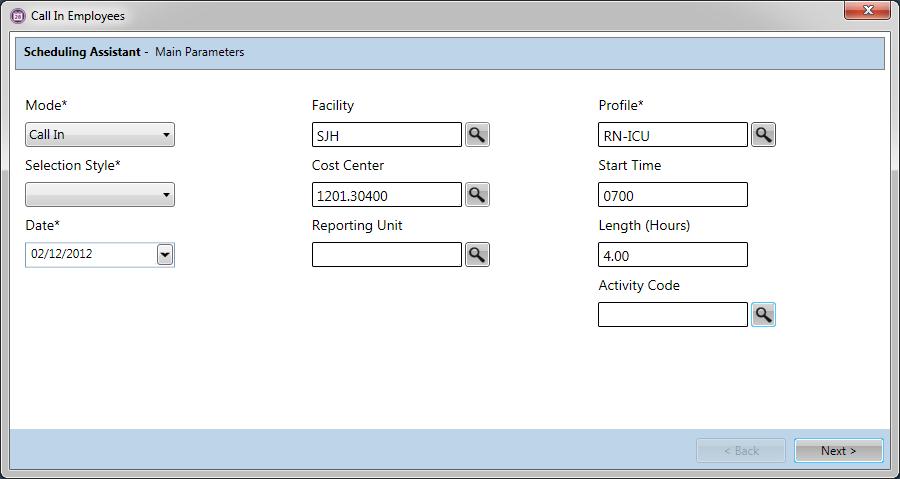
The Call In scheduling assistant wizard appears.

The Mode should be Call In. When a cell is understaffed, the Mode defaults to Call In.
Selection styles are previously set up in the Configuration section > Schedule card > Selection Styles screen, with the Type set to Scheduling Assistant Call In.
Built in to the selection style are the qualifications for each of the passes and the sorting rules. If you set a personal default selection style or the system has a default selection style, this selection style is automatically entered in this field; however, it can be changed.
These fields may be prefilled, based on the cell you highlighted in the balancing grid. These values can be changed.
Search for and select the appropriate activity code. If there are values in the Start Time and Length fields, the values are removed.
Use the Start Time and Length fields or the Activity Code field, but not both.
The availability of these fields depends on whether each field is allowed to be viewed or is hidden, as set up on the Selection Style.

The availability of these fields depends on whether each field is allowed to be viewed or is hidden, as set up on the Selection Style.
A list of qualified employees appears. Employee names appear under each pass that they qualified for, listed in the order determined by the sorting rules.

Some employees may qualify for more than one activity code within a pass and for more than one pass.
This creates a report with the qualified employees, their phone numbers, and a place for comments.
The selected employees are now assigned the activity code and appears on the schedule.